一、起步
1.1 项目创建
安装脚手架
创建新项目
1.2 项目文件
1
2
3
4
5
6
| src
├── app.controller.spec.ts
├── app.controller.ts
├── app.module.ts
├── app.service.ts
└── main.ts
|
含义
| 文件名 |
含义 |
| app.controller.ts |
带有单个路由的基本控制器示例。 |
| app.controller.spec.ts |
对于基本控制器的单元测试样例 |
| app.module.ts |
应用程序的根模块。 |
| app.service.ts |
带有单个方法的基本服务 |
| main.ts |
应用程序入口文件。它使用 NestFactory 用来创建 Nest
应用实例。 |
1.3 启动项目
 image-20230113144220518
热启动项目(实时更新):
1.4 主文件
1
2
3
4
5
6
7
8
9
|
import { NestFactory } from "@nestjs/core";
import { AppModule } from "./app.module";
async function bootstrap() {
const app = await NestFactory.create(AppModule);
await app.listen(3000);
}
bootstrap();
|
要创建一个 Nest 应用实例,我们使用了 NestFactory
核心类。NestFactory
暴露了一些静态方法用于创建应用实例。
create() 方法返回一个实现 INestApplication
接口的对象。该对象提供了一组可用的方法,我们会在后面的章节中对这些方法进行详细描述。
在上面的 main.ts 示例中,我们只是启动 HTTP
服务,让应用程序等待 HTTP 请求。
1.5 创建 Moudle
1.5.1 手动创建
src/auth/auth.moudle.ts
1
2
3
4
| import { Module } from "@nestjs/common";
@Module({})
export class AuthModule {}
|
导入到 app 中
src/app.module.ts
1
2
3
4
5
6
7
| import { Module } from "@nestjs/common";
import { AuthModule } from "./auth/auth.module";
@Module({
imports: [AuthModule],
})
export class AppModule {}
|
1.5.2 命令行创建
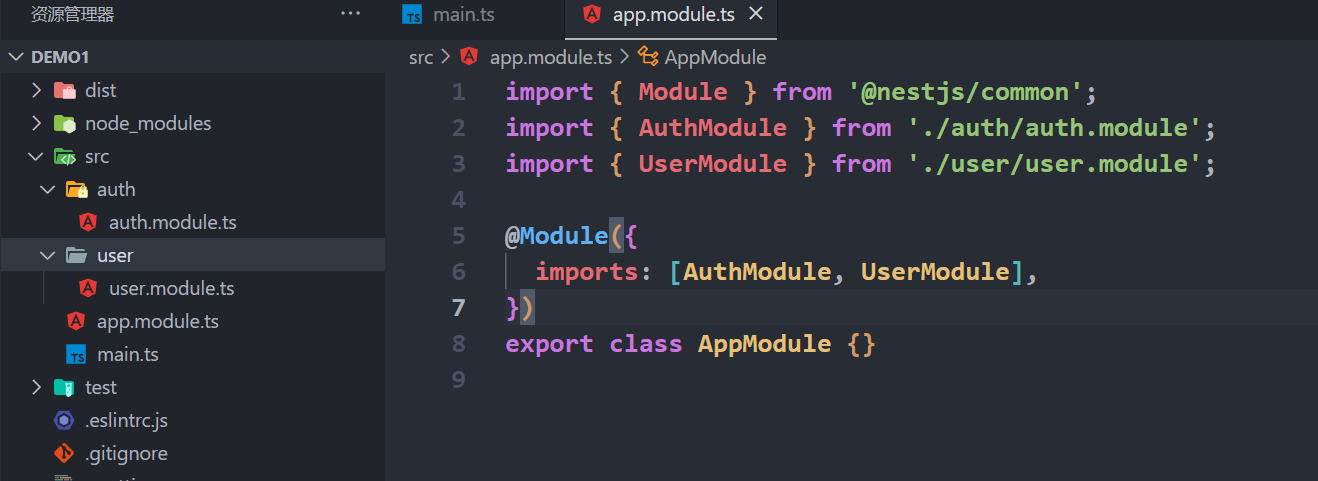 image-20230113165522565
1.6 创建完整模块
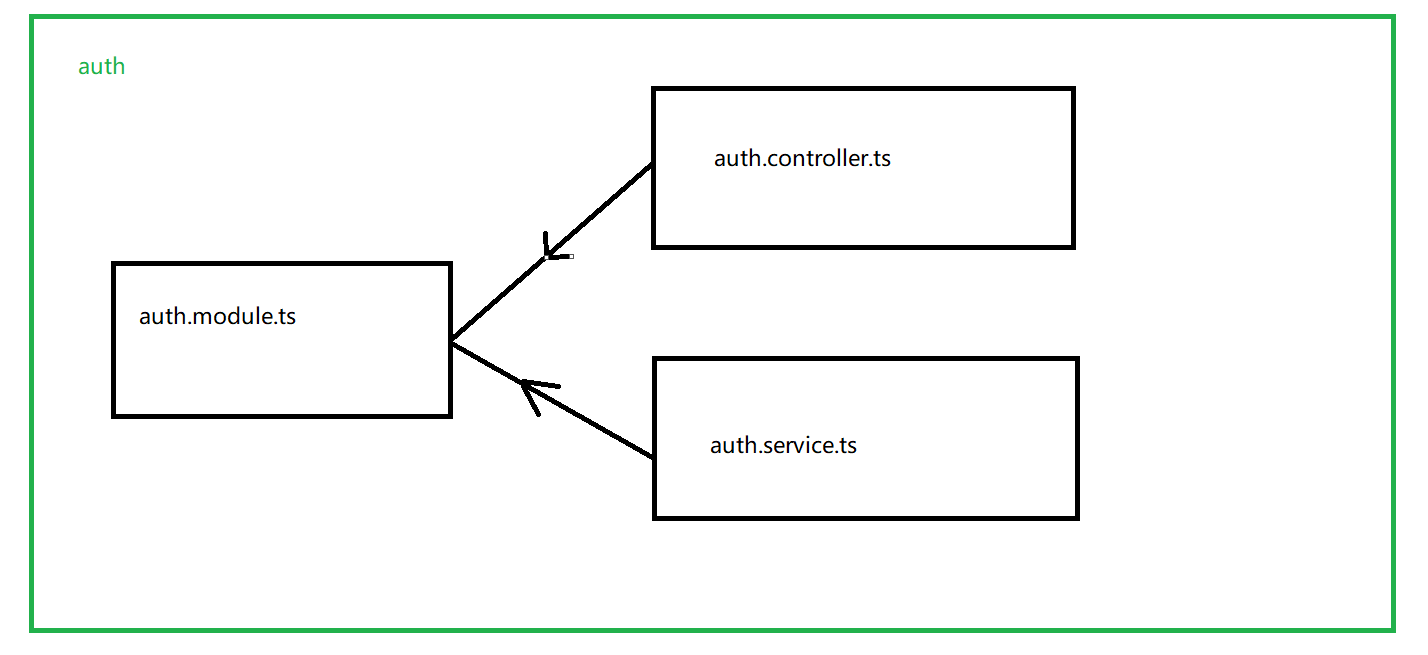 image-20230113170716951
controller 关注于请求的逻辑
service 关注具体实现
1
2
3
4
5
6
7
8
9
10
11
|
import { Module } from "@nestjs/common";
import { AuthContriller } from "./auth.controller";
import { AuthService } from "./auth.service";
@Module({
controllers: [AuthContriller],
providers: [AuthService],
})
export class AuthModule {}
|
1
2
3
4
5
6
7
8
9
10
11
12
13
14
15
16
17
18
19
20
21
|
import { Controller, Post } from "@nestjs/common";
import { AuthService } from "./auth.service";
@Controller("auth")
export class AuthContriller {
constructor(private authService: AuthService) {}
@Post("signup")
signup() {
return this.authService.signup();
}
@Post("signin")
signin() {
return this.authService.signin();
}
}
|
1
2
3
4
5
6
7
8
9
10
11
12
13
14
|
import { Injectable } from "@nestjs/common";
@Injectable()
export class AuthService {
signup() {
return { msg: "This is a signup page!" };
}
signin() {
return { msg: "This is a signin page!" };
}
}
|
二、基本概念
2.1 控制器
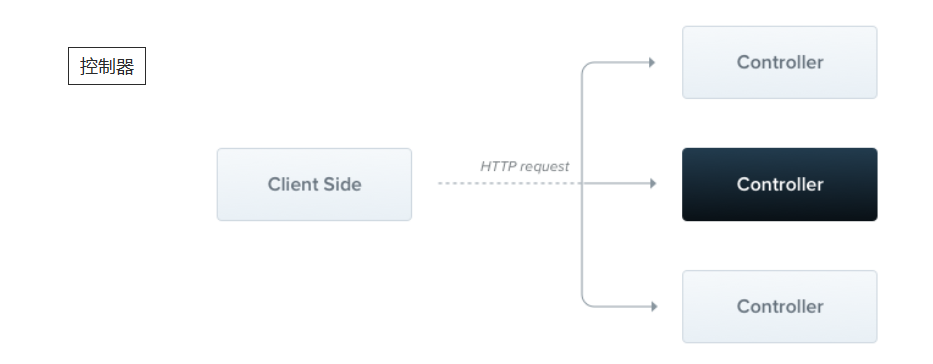 image-20230113144733598
目的:接受应用的特定请求;
控制器与路由:通常一个控制器含多个请求,不同的路由执行不同的操纵;
创建控制器:使用类和装饰器;
1
| $ nest g controller cats
|
2.1.1 路由
在下面的例子中,我们使用 @Controller()
装饰器定义一个基本的控制器。
可选 路由路径前缀设置为 custom。在
@Controller()
装饰器中使用路径前缀可以使我们轻松地对一组相关的路由进行分组,并最大程度地减少重复代码。
1
2
3
4
5
6
7
8
9
10
11
12
13
14
15
16
17
18
|
import { Controller, Get } from "@nestjs/common";
import { AppService } from "./app.service";
@Controller("/custom")
export class AppController {
constructor(private readonly appService: AppService) {}
@Get("/eye")
getEye(): string {
return "我是眼睛";
}
@Get("/mouse")
getMouse(): string {
return "我是嘴巴";
}
}
|
请求
 image-20230113145438467
 image-20230113145600949
这里案例来说应该返回状态码加数据,而网页中直接显示了数据,原因是 nest
有两种操作响应。
标准:使用这个内置方法,当请求处理程序返回一个
JavaScript 对象或数组时,它将自动序列化为
JSON。但是,当它返回一个 JavaScript
基本类型(例如string、number、boolean)时, Nest
将只发送值,而不尝试序列化它。这使响应处理变得简单:只需要返回值,其余的由
Nest 负责。
类库特有:我们可以在函数签名处通过 @Res()
注入类库特定的响应对象(例如,
Express)。使用此方法,你就能使用由该响应对象暴露的原生响应处理函数。例如,使用
Express,您可以使用
response.status(200).send() 构建响应
类库特有
1
2
3
4
| @Get('head')
getHead(@Res() res) {
res.status(HttpStatus.OK).send();
}
|
而且,在上面的示例中,你失去与依赖于 Nest 标准响应处理的 Nest
功能(例如,拦截器(Interceptors) 和
@HttpCode()/@Header()
装饰器)的兼容性。要解决此问题,可以将 passthrough
选项设置为 true,如下所示:
1
2
3
4
5
| @Get('head')
getHead(@Res({passthrough:true}) res) {
res.status(HttpStatus.OK)
return []
}
|
访问请求细节。
需要引入Req和import {Request} from 'express';
1
2
3
4
5
6
7
8
9
10
11
12
13
14
15
| import { Controller, Get, Req } from "@nestjs/common";
import { AppService } from "./app.service";
import { Request } from "express";
@Controller("/custom")
export class AppController {
constructor(private readonly appService: AppService) {}
@Get("/eye")
getEye(@Req() request: Request): string {
console.log(request);
return "我是眼睛";
}
}
|
Request 对象代表 HTTP
请求,并具有查询字符串,请求参数参数,HTTP 标头(HTTP header) 和
正文(HTTP body)的属性(在这里阅读更多)。在多数情况下,不必手动获取它们。
我们可以使用专用的装饰器,比如开箱即用的 @Body() 或
@Query() 。 下面是 Nest
提供的装饰器及其代表的底层平台特定对象的对照列表。
多个装饰器
1
2
3
4
5
6
7
| @Get('/eye')
getEye(@Req() request:Request,@Ip() ip,@HostParam() host): string {
console.log(request.ip);
console.log(ip);
console.log(host);
return '我是眼睛'
}
|
2.1.3 Post
1
2
3
4
| @Post('/foot')
getFoot():string{
return '我是脚'
}
|
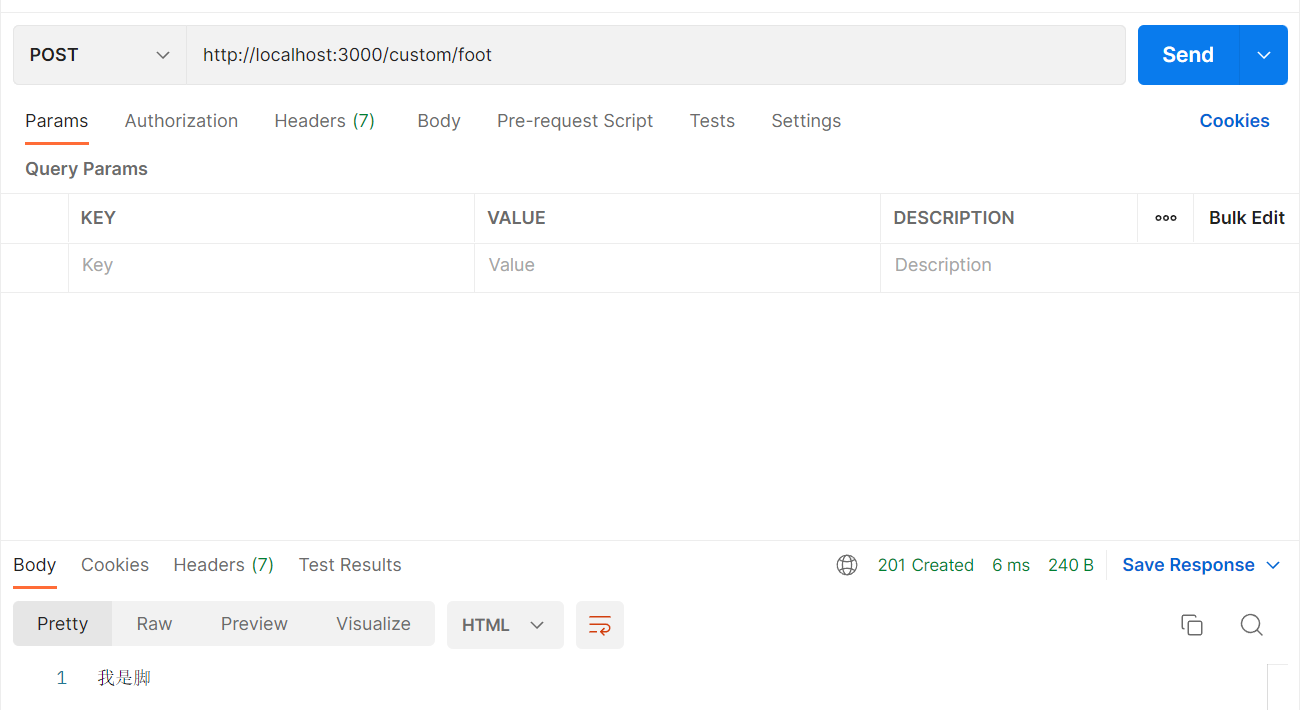 image-20230113153133595
Nest 为所有标准的 HTTP
方法提供了相应的装饰器:@Put()、@Delete()、@Patch()、@Options()、以及
@Head()。此外,@All()
则用于定义一个用于处理所有 HTTP 请求方法的处理程序。
2.1.4 路由通配符
1
2
3
4
| @Get('hand*s')
getHead():string{
return '我是手'
}
|
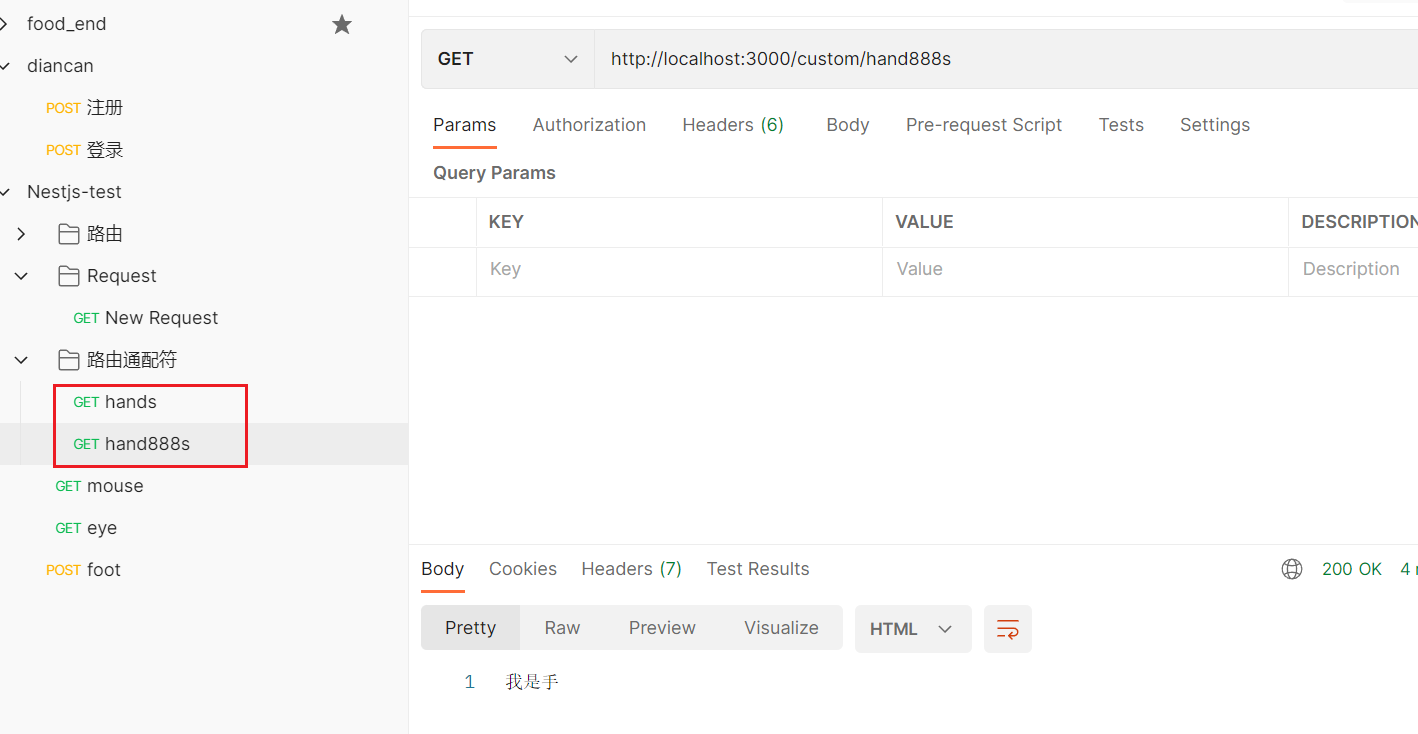 image-20230113154504739
路由路径 'ab*cd' 将匹配 abcd
、ab_cd 、abecd 等。字符 ?
、+ 、 * 以及 ()
是它们的正则表达式对应项的子集。连字符(-)
和点(.)按字符串路径逐字解析。
2.1.5 状态码
状态码默认是 200(post 为
201),可通过@HttpCode()更改状态码
1
2
3
4
5
| @Post('foot')
@HttpCode(204)
getFoot():string{
return '我是脚'
}
|
指定自定义响应头,可以使用 @header()
装饰器或类库特有的响应对象
1
2
3
4
5
| @Post()
@Header('Cache-Control', 'none')
create() {
return 'This action adds a new cat';
}
|
2.1.7 重定向
要将响应重定向到特定的 URL,可以使用
@Redirect() 装饰器或特定于库的响应对象
@Redirect()装饰器有两个可选参数,url和
statusCode。 如果省略,则 statusCode 默认为
302
1
2
| @Get()
@Redirect('https://nestjs.com', 301)
|
2.1.8 路由参数
1
2
3
4
| @Get('mouse/:id')
getMouseId(@Param() params): string {
return `我是嘴巴${params.id}`
}
|
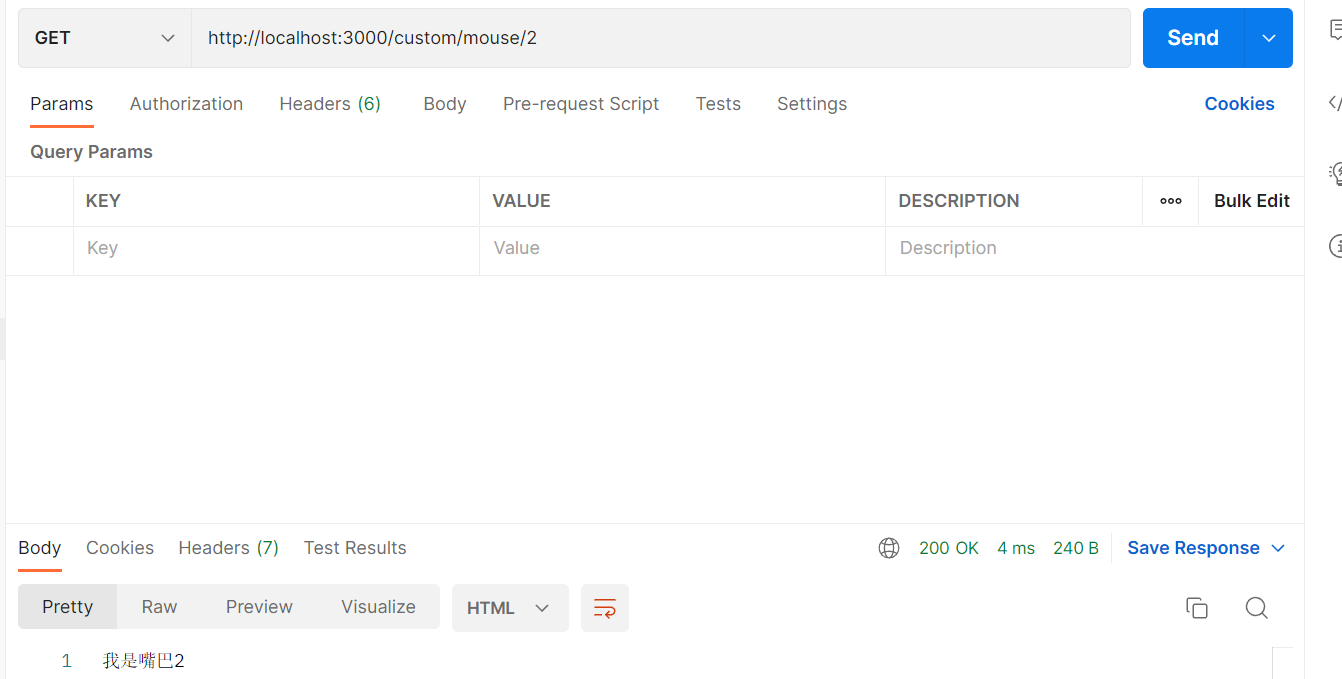 image-20230113155638965
或者写成
1
2
3
4
| @Get('mouse/:id')
getMouseId(@Param('id') id): string {
return `我是嘴巴${id}`
}
|
@Controller 装饰器可以接受一个 host
选项,以要求传入请求的 HTTP 主机匹配某个特定值
1
2
3
4
5
6
7
| @Controller({ host: "admin.example.com" })
export class AdminController {
@Get()
index(): string {
return "Admin page";
}
}
|
2.1.10 异步性
1
2
3
4
5
6
7
|
@Get()
async findAll(): Promise<any[]> {
return [];
}
|
2.1.11 请求负载
首先(如果您使用 TypeScript),我们需要确定
DTO(数据传输对象)模式。DTO是一个对象,它定义了如何通过网络发送数据。我们可以通过使用
TypeScript 接口(Interface)或简单的类(Class)来定义
DTO 模式。有趣的是,我们在这里推荐使用类。
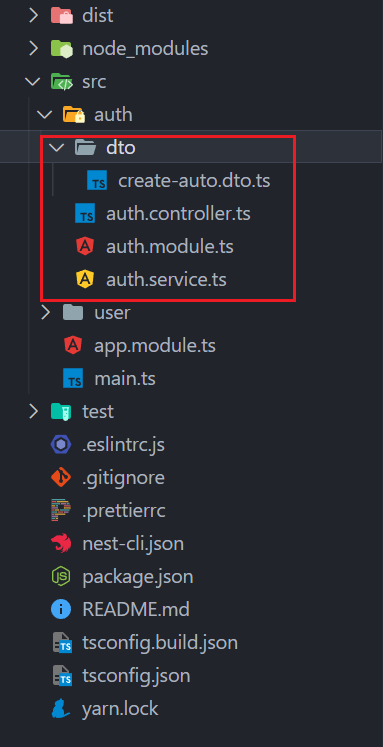 image-20230113193701850
1
2
3
4
5
6
7
|
export class CreateAuthDto {
name: string;
age: number;
}
|
1
2
3
4
5
6
7
8
9
|
@Get('getUser/:id')
getUser(
@Body() body:CreateAuthDto,
@Param() params:{id:number}
){
return this.authService.getUser(body,params);
}
|
1
2
3
4
5
6
7
8
|
getUser(
body:CreateAuthDto,
params:{id:number}
){
return {msg:body,params}
}
|
六、管道
6.1 应用场景
管道有两个典型的应用场景:
- 转换:管道将输入数据转换为所需的数据输出(例如,将字符串转换为整数)
- 验证:对输入数据进行验证,如果验证成功继续传递;
验证失败则抛出异常
6.2 内置管道
Nest 自带九个开箱即用的管道,即
ValidationPipeParseIntPipeParseFloatPipeParseBoolPipeParseArrayPipeParseUUIDPipeParseEnumPipeDefaultValuePipeParseFilePipe
他们从 @nestjs/common 包中导出。
6.3 绑定管道
1
2
3
4
5
6
|
@Get('searchUser/:useId')
searchUser(@Param('useId',ParseIntPipe) id:number){
return this.authService.searchUser(id);
}
|
1
2
3
4
5
|
searchUser(id:number){
return {msg:id}
}
|
这里绑定的管道是一个类而不是一个实例对象,如果要改变内置管道的行为,在绑定时通过
new 新建一个实例对象并绑定
1
2
3
4
| @Get('searchUser/:useId')
searchUser(@Param('useId',new ParseIntPipe({ errorHttpStatusCode: HttpStatus.NOT_ACCEPTABLE })) id:number){
return this.authService.searchUser(id);
}
|
且会将 string 转换为 int
成功
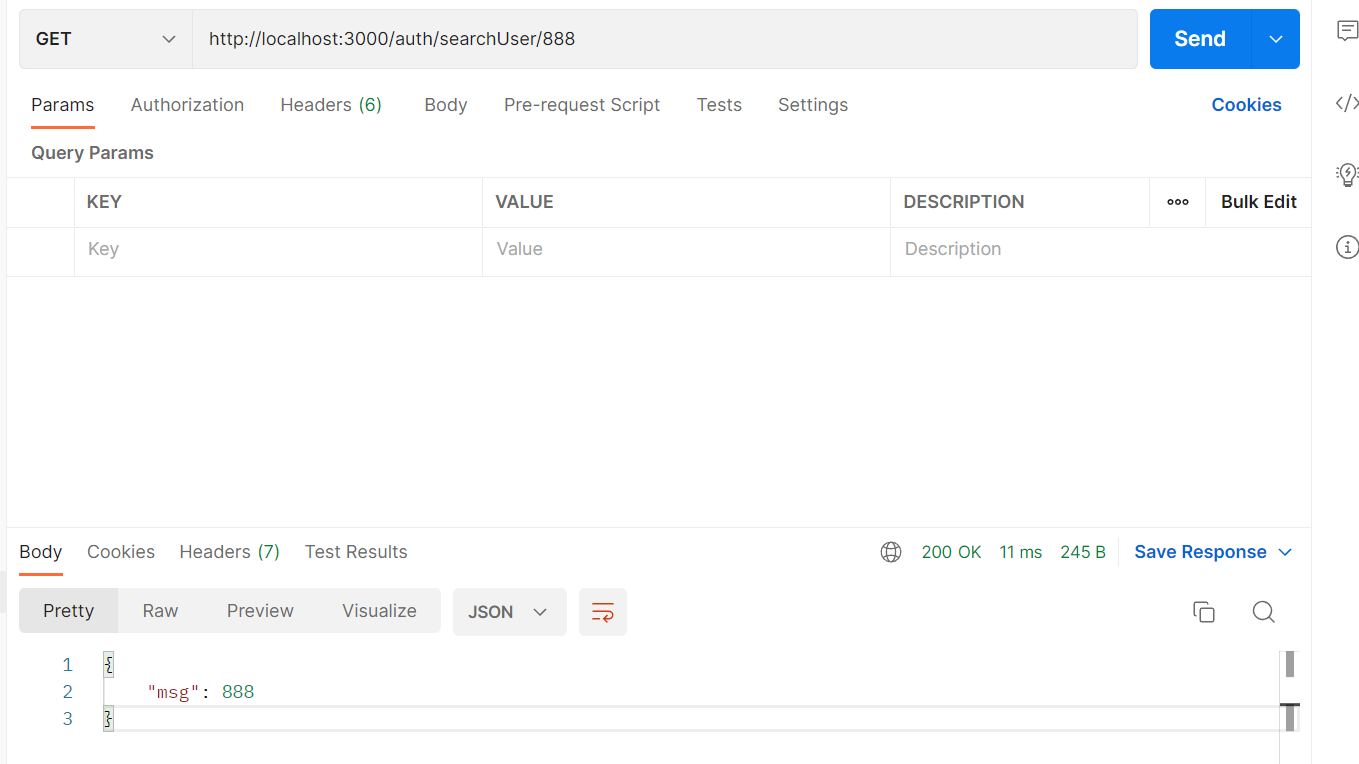 image-20230113195136018
失败
 image-20230113195219407
七、技术
7.1.1 全局使用
安装依赖
1
| $ npm i --save class-validator class-transformer
|
注入全局验证管道
app.useGlobalPipes(new ValidationPipe())
1
2
3
4
5
6
7
8
9
10
11
12
|
import { ValidationPipe } from "@nestjs/common";
import { NestApplication, NestFactory } from "@nestjs/core";
import { AppModule } from "./app.module";
async function bootstrap() {
const app = await NestFactory.create(AppModule);
app.useGlobalPipes(new ValidationPipe());
await app.listen(3000);
}
bootstrap();
|
Dto
1
2
3
4
5
6
7
8
9
| import { IsEmail, IsNotEmpty } from "class-validator";
export class UpdateAuthDto {
@IsEmail()
email: string;
@IsNotEmpty()
name: string;
}
|
使用验证
1
2
3
4
5
6
|
@Get('updateUser')
updateUser(@Body() body:UpdateAuthDto){
return this.authService.updateUser(body);
}
|
1
2
3
4
5
|
updateUser(body:UpdateAuthDto){
return {msg:body};
}
|
失败
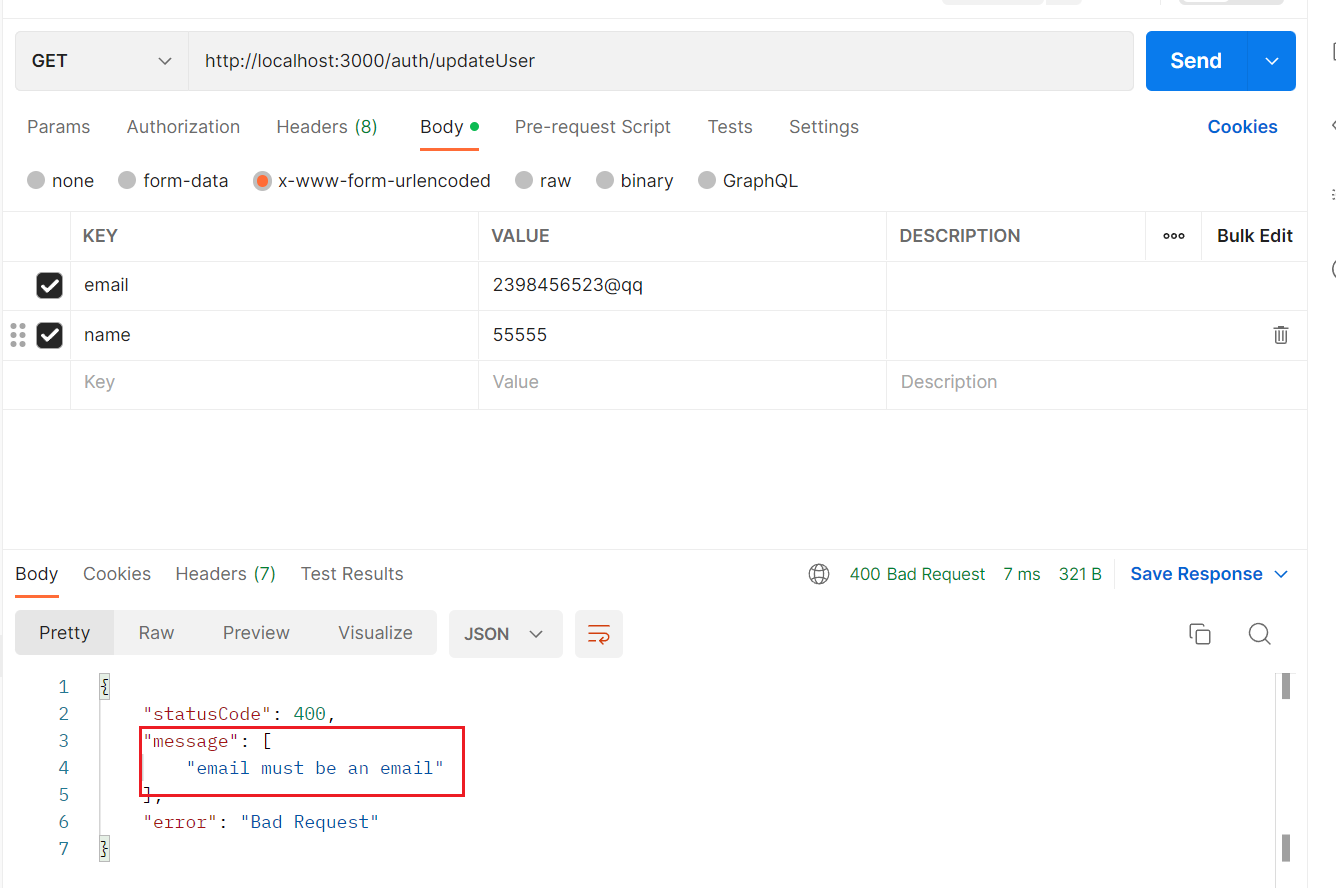 image-20230113211331532
成功
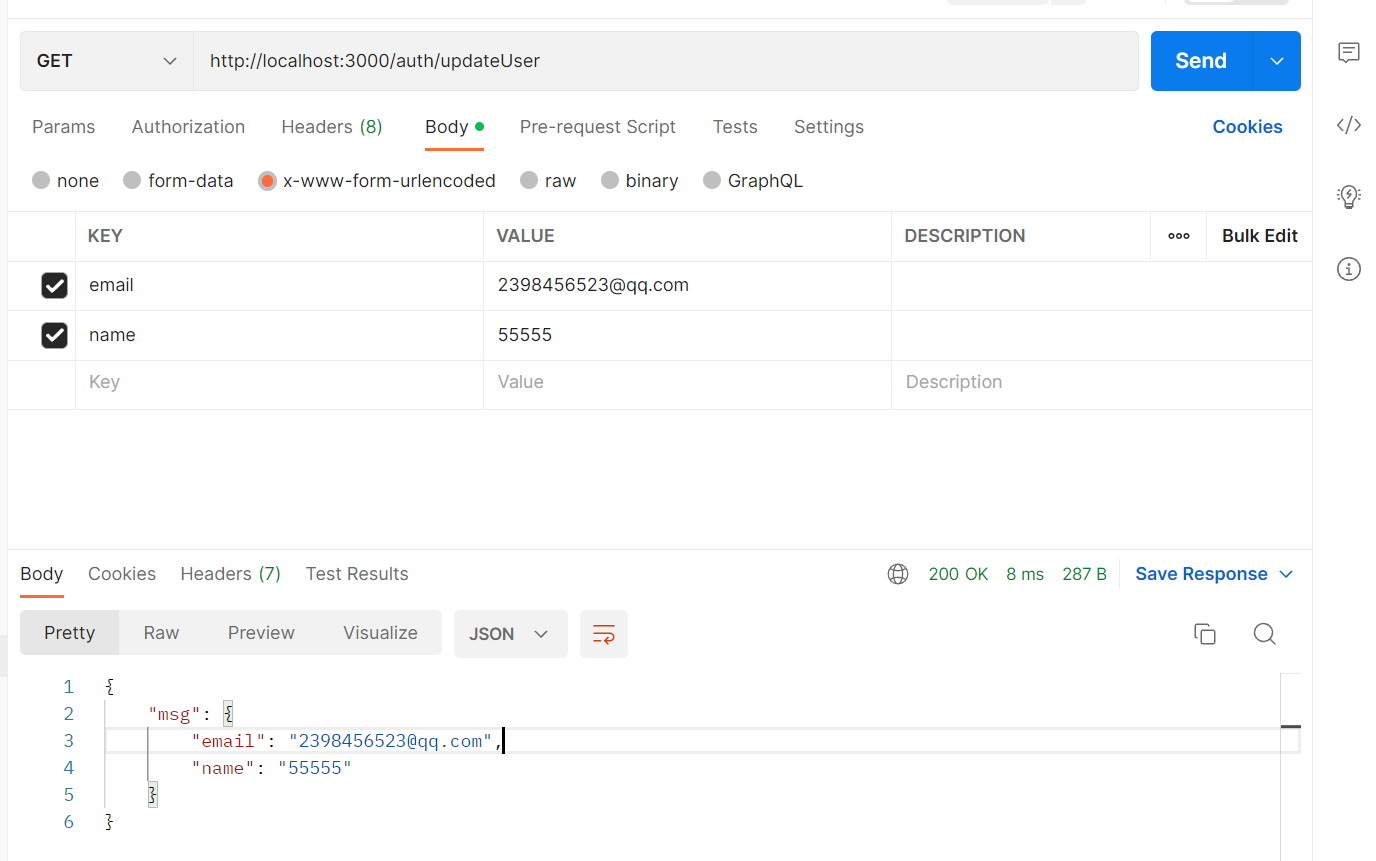 image-20230113211258694
7.1.2 剥离属性
有时我们不处理 token
这个字段,而前端在请求时发送了这个字段,这是可以使用剥离属性,将不接受用不到的属性
1
2
3
4
5
| app.useGlobalPipes(
new ValidationPipe({
whitelist: true,
})
);
|
使用后
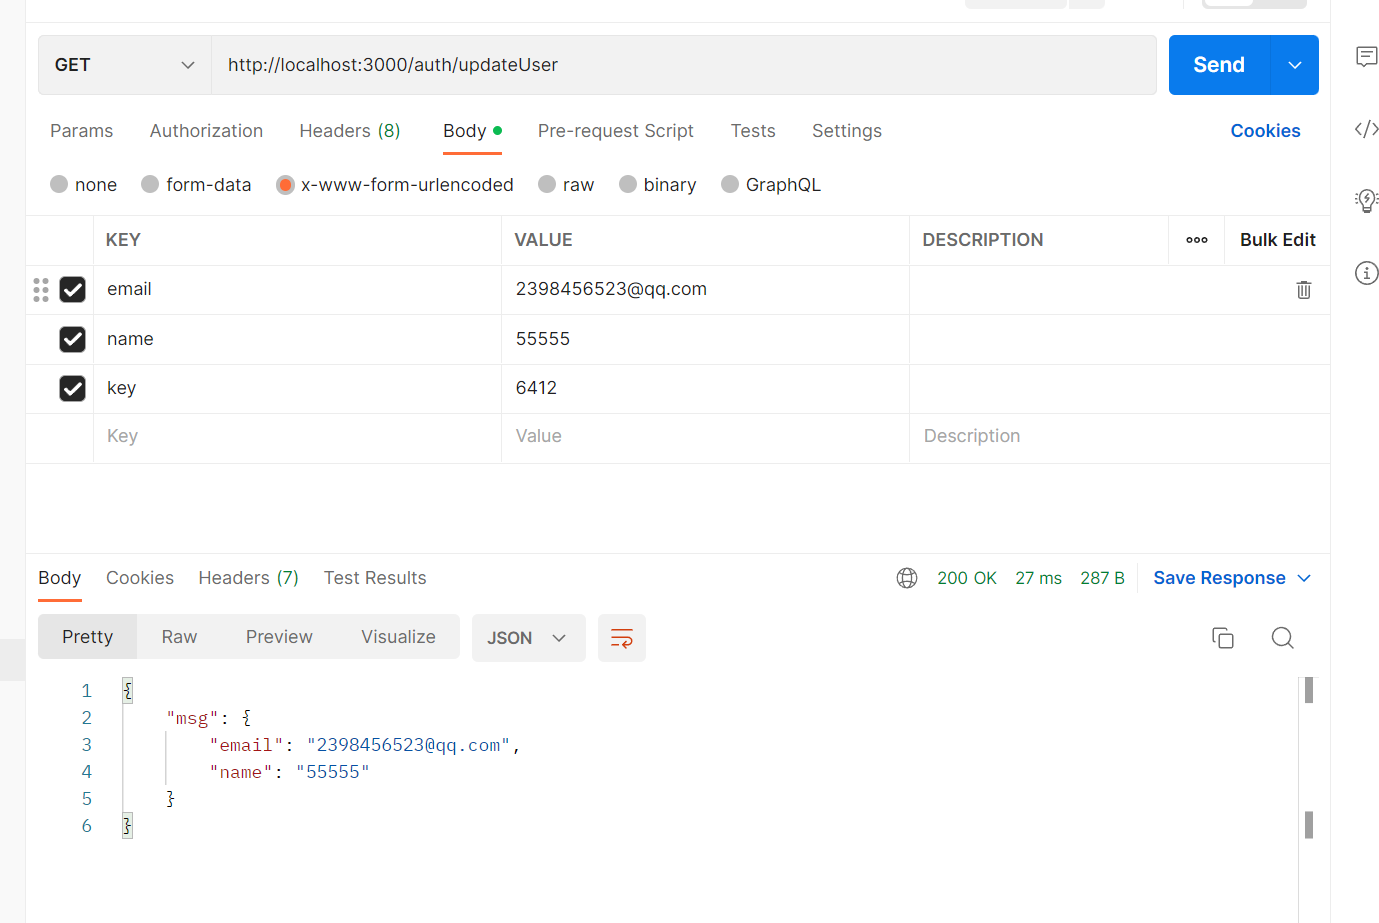 image-20230113212050272
7.1.3 使用管道转换
如我们在发送 get 请求时,携带 body 中有 age,但是发送到后端 age 变成
string,我们需要将 string 变成 int,只需要使用 6.3 即可。
7.2 使用 Mongo 数据库
7.2.1 基本步骤
安装相关依赖
1
| yarn add --save @nestjs/mongoose mongoose
|
连接数据库
1
2
3
4
5
6
7
8
9
10
11
12
13
|
import { Module } from "@nestjs/common";
import { MongooseModule } from "@nestjs/mongoose";
import { AuthModule } from "./auth/auth.module";
@Module({
imports: [
AuthModule,
MongooseModule.forRoot("mongodb://127.0.0.1:27017/musicians"),
],
})
export class AppModule {}
|
表示连接 musicians 数据库
创建一个模型
1
2
3
4
5
6
7
8
9
10
11
12
13
14
15
16
|
import * as mongoose from "mongoose";
const Schema = mongoose.Schema;
const d = new Date();
export const UserSchema = new Schema({
username: { type: String },
password: { type: String },
mobile: { type: String },
email: { type: String },
status: { type: String },
role_id: { type: String },
add_time: { type: Number, default: d.getTime() },
is_supper: { type: Number },
});
|
引入模型
1
2
3
4
5
6
7
8
9
10
11
12
13
14
15
16
17
18
19
20
| import { Module } from "@nestjs/common";
import { AuthContriller } from "./auth.controller";
import { AuthService } from "./auth.service";
import { MongooseModule } from "@nestjs/mongoose";
import { UserSchema } from "./schema/users.schema";
@Module({
imports: [
MongooseModule.forFeature([
{
name: "User",
schema: UserSchema,
collection: "test",
},
]),
],
controllers: [AuthContriller],
providers: [AuthService],
})
export class AuthModule {}
|
模型的名称为 User,集合 test
使用模型
1
2
3
4
5
6
7
8
9
10
11
| import { Injectable } from "@nestjs/common";
import { InjectModel } from "@nestjs/mongoose";
@Injectable()
export class AuthService {
constructor(@InjectModel("User") private userModel) {}
async signup() {
let result = await this.userModel.find().exec();
return { msg: result };
}
}
|
依赖注入创建 userModel 属性
创建成功
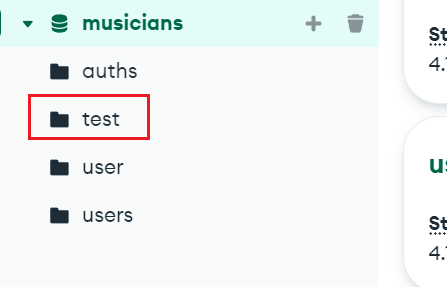 image-20230114213520674
7.2.2 CRUD
创建用户
1
2
3
4
5
6
7
8
9
10
11
12
|
@Post('addUser')
addUser(@Body() body:any){
return this.authService.addUser(body);
}
async addUser(body:any){
this.userModel.create(body);
return body;
}
|
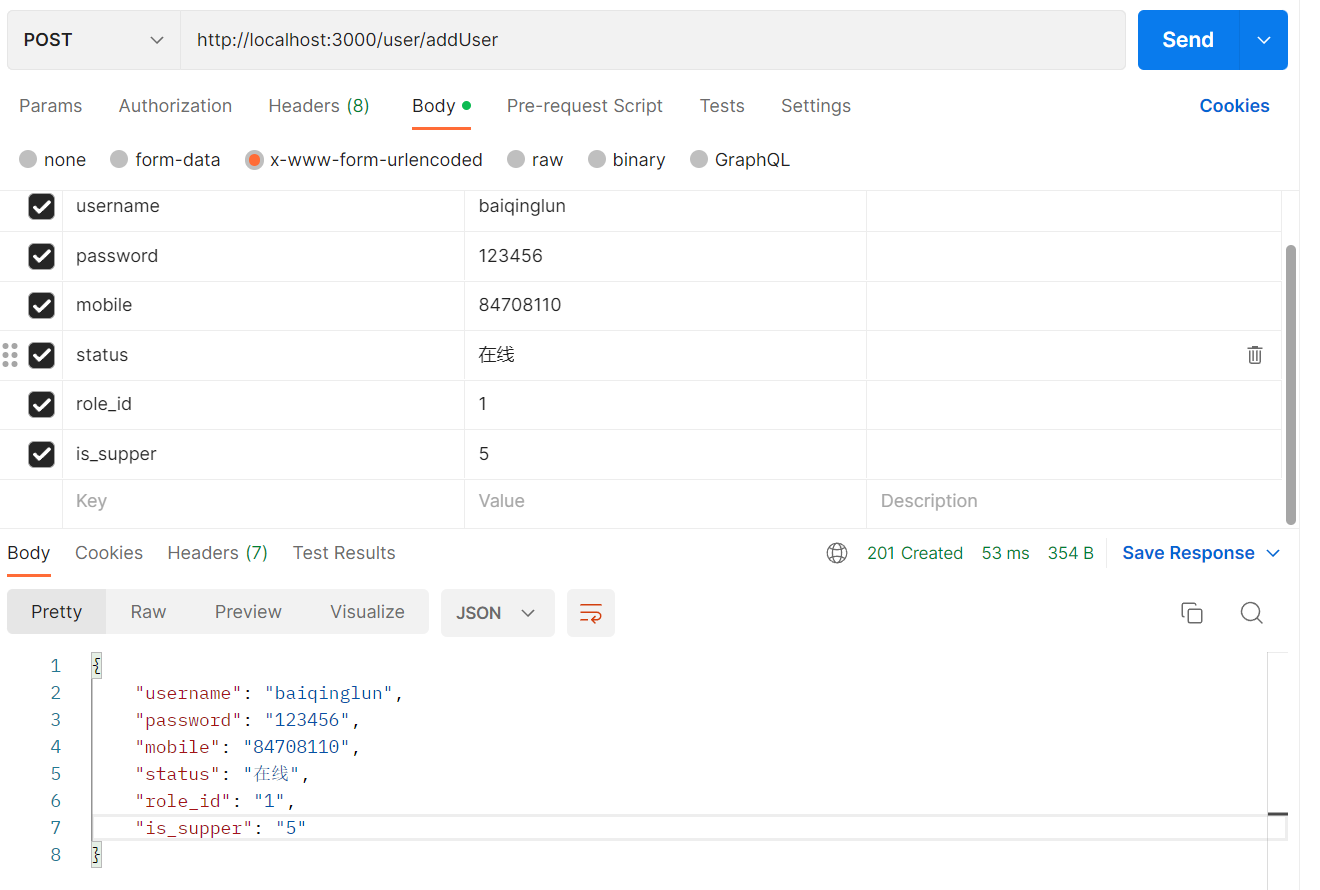 image-20230114214717752
查询所有用户
1
2
3
4
| async findAll(){
let result = await this.userModel.find().exec();
return {msg:result};
}
|
查找单个用户
1
2
3
| async findOne(_id: string): Promise<User> {
return await this.userModel.findById(_id);
}
|
编辑单个用户
1
2
3
| async editOne(_id: string, body: EditUserDTO): Promise<void> {
await this.userModel.findByIdAndUpdate(_id, body);
}
|
删除用户
1
2
3
| async deleteOne(_id: string): Promise<void> {
await this.userModel.findByIdAndDelete(_id);
}
|
附件
装饰器
| 装饰器 |
含义 |
| @Controller() |
定义一个基本控制器 |
| @Get() |
定义一个 get 接口 |
| @Post() |
定义一个 post 接口 |
| @Put() |
定义一个 put 接口 |
| @Delete() |
定义一个 delete 接口 |
| @Patch() |
定义一个 patch 接口 |
| @Options() |
定义一个 option 接口 |
| @All() |
定义一个处理所有 HTTP 请求的接口 |
| @Request(),@Req() |
对应 req,Nest 将请求对象注入处理到 |
| @Response(),@Res()* |
对应 res |
| @Next() |
对应 next |
| @Session() |
对应 req.session |
| @Param(key?:
string) |
对应 req.params/req.params[key] get |
| @Body(key?:
string) |
对应 req.body/req.body[key] post |
| @Query(key?:
string) |
对应 req.query/req.query[key] |
| @Headers(name?:
string) |
对应 req.headers/req.headers[name] |
| @Ip() |
对应 req.ip |
| @HostParam() |
对应 req.hosts |
| @HttpCode() |
更改状态码 |
| @Header() |
更改请求头 |
| @Module() |
定义模块 |


